Quantcast
Channel: Handmade Jane
Viewing all 298 articles
Browse latest View live

Boiled Wool Coat Plans

$
0
0
Let's talk about boiled wool shall we?! I've been interested in this fabric for a while, primarily because sewing with it allows many shortcuts for the lazy amongst us (of which I am queen!) For those of you who aren't familiar with boiled wool, it's a wool fabric that's pre-shrunk by boiling at high temperatures (the clue's in the name!) This process causes the fibres to compress and interlock, resulting in a soft, springy felt-like fabric. Because of the tightly woven fibres, boiled wool is impressively resistant to wind and rain, making it perfect for outdoor garments such as coats, jackets and hats. From a sewing point of view, it has two major advantages:

- Because of the tightly woven fibres, it doesn't fray when cut, so no need to finish seams. Hoorah!

- If you're after a winter coat, you don't need to add underlining or interlining for extra warmth. In fact, if you're after a very simple coat or jacket, you don't even need to line it at all if you don't want to (more on this in a minute).


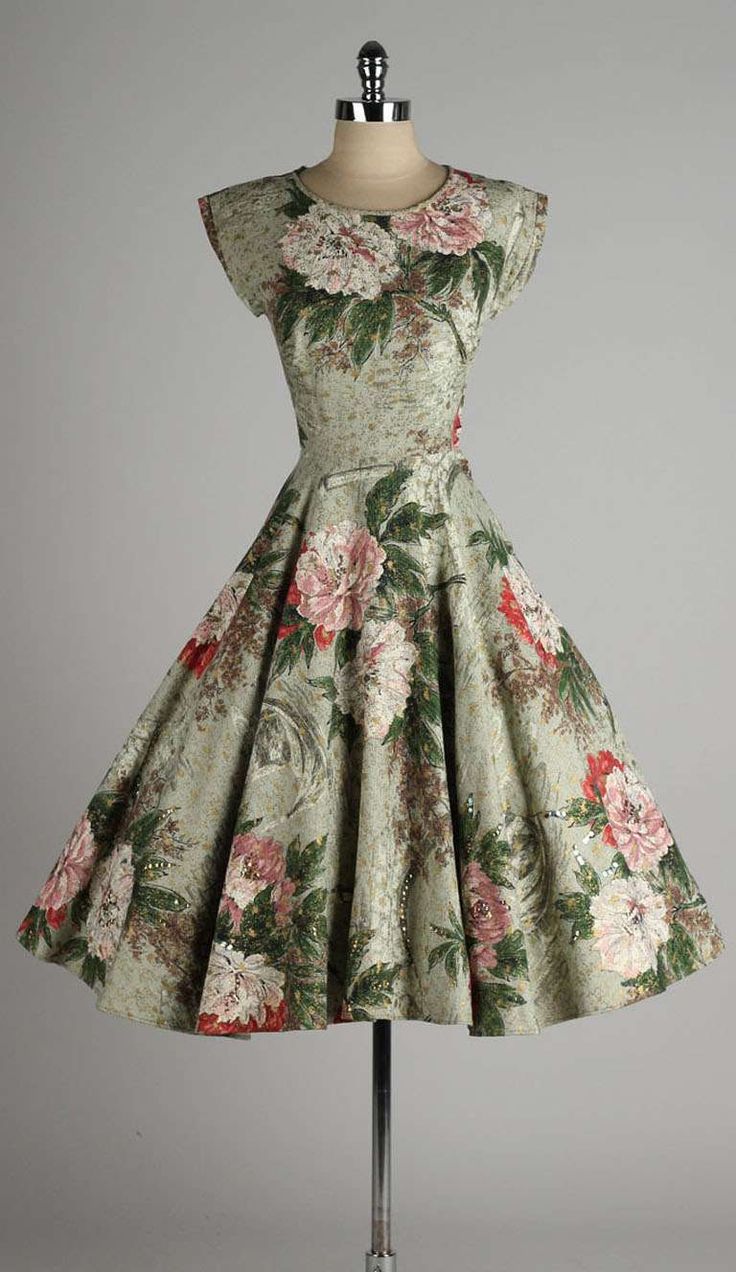
With this in mind, I thought boiled wool would be a perfect choice for my next project: a casual coat/cardigan. Design-wise I had a very simple shape in my head: above the knee and slim fitting with no collar. I was initially thinking of drafting my own, but I've come to the conclusion that I need to practice my drafting skills on a few simple garments first before unleashing them on a coat! I'm getting there though, I've almost finished drafting my first dress so look out for that soon. 

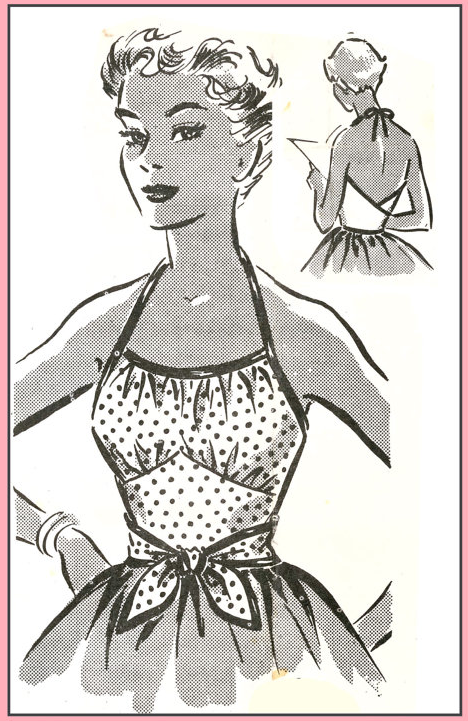
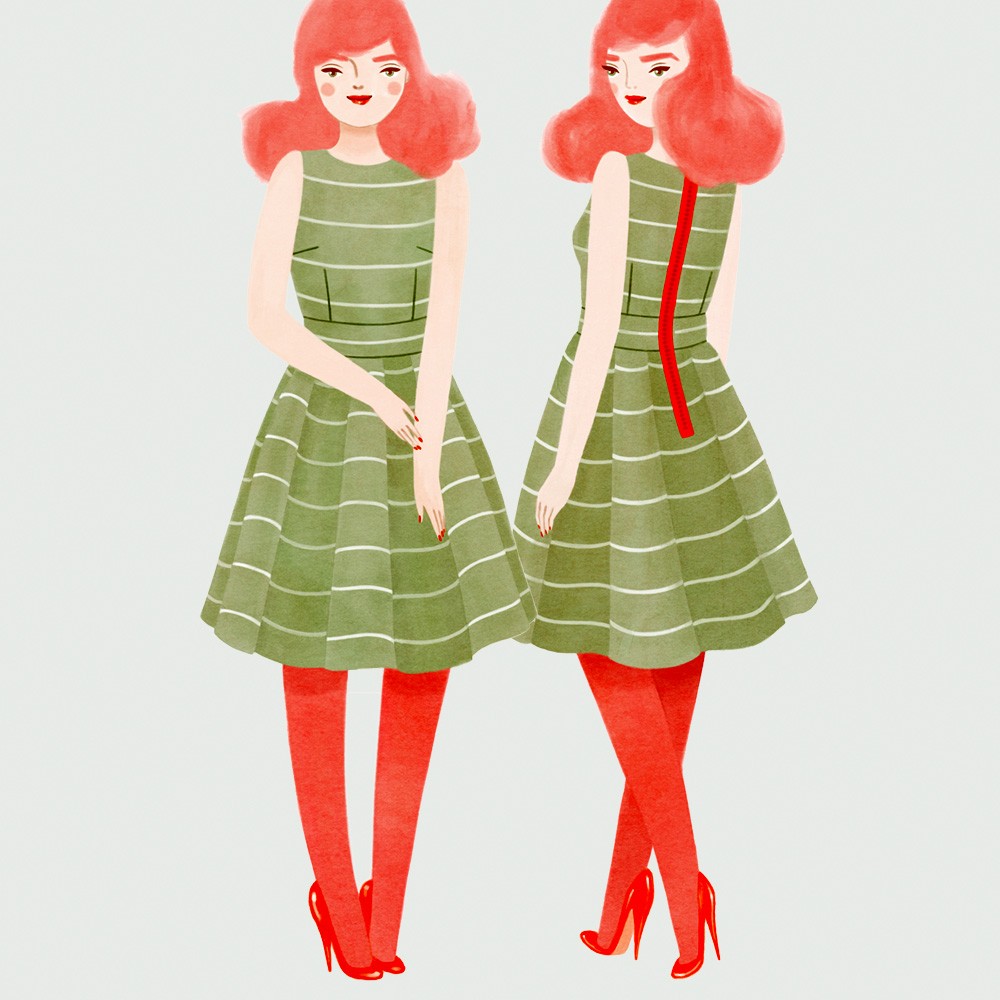
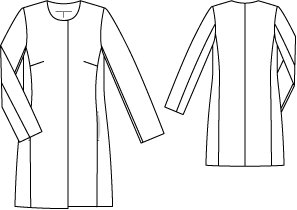
As far as inspiration goes, I was rather taken with the Named Patterns Andy Coat. When I met up with Scruffy Badger recently, I was able to inspect her beautiful version at close quarters and was mightily impressed with the tailoring details: bound buttonholes, welt pockets, fully lined, two piece sleeves etc. I was sorely tempted, but to be honest the pattern involved a bit more work than I was willing to put in (I told you I was lazy!) But then I came across this Collarless Open Coat pattern from Burda (03/2012 #110).


It's a very simple design with princess seams, two-piece sleeves, centre back seam and no collar. It's also an edge-to-edge style, which means no buttons. I'm not sure how I feel about this - on the one hand it's a casual coat for spring time, so it probably won't need buttoning up, but then again, it might drive me mad not having any. It's a tricky one… it's not totally edge-to-edge, there is a slight overlap, so I may sew on a few covered snaps as contingency. I'll have a think about it and let you know what I decide. Any thoughts?


I actually made a muslin of the coat (gasp) - I cut a Burda size 40 which looks just a tad too big all over (obviously the sleeves will need about half a foot chopping off). So I think I'm going to size down all over, take a tiny bit more off the shoulders and shape it in very slightly at the waist. I'll also need to shorten the whole thing by about six inches to get the length I want. Nothing too dramatic, and after that I'll be ready to start working with my boiled wool, eek!

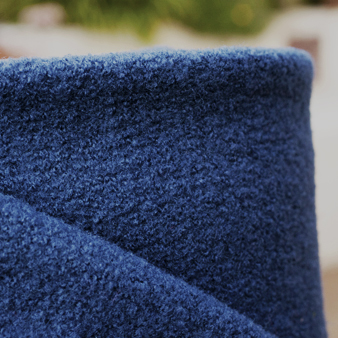
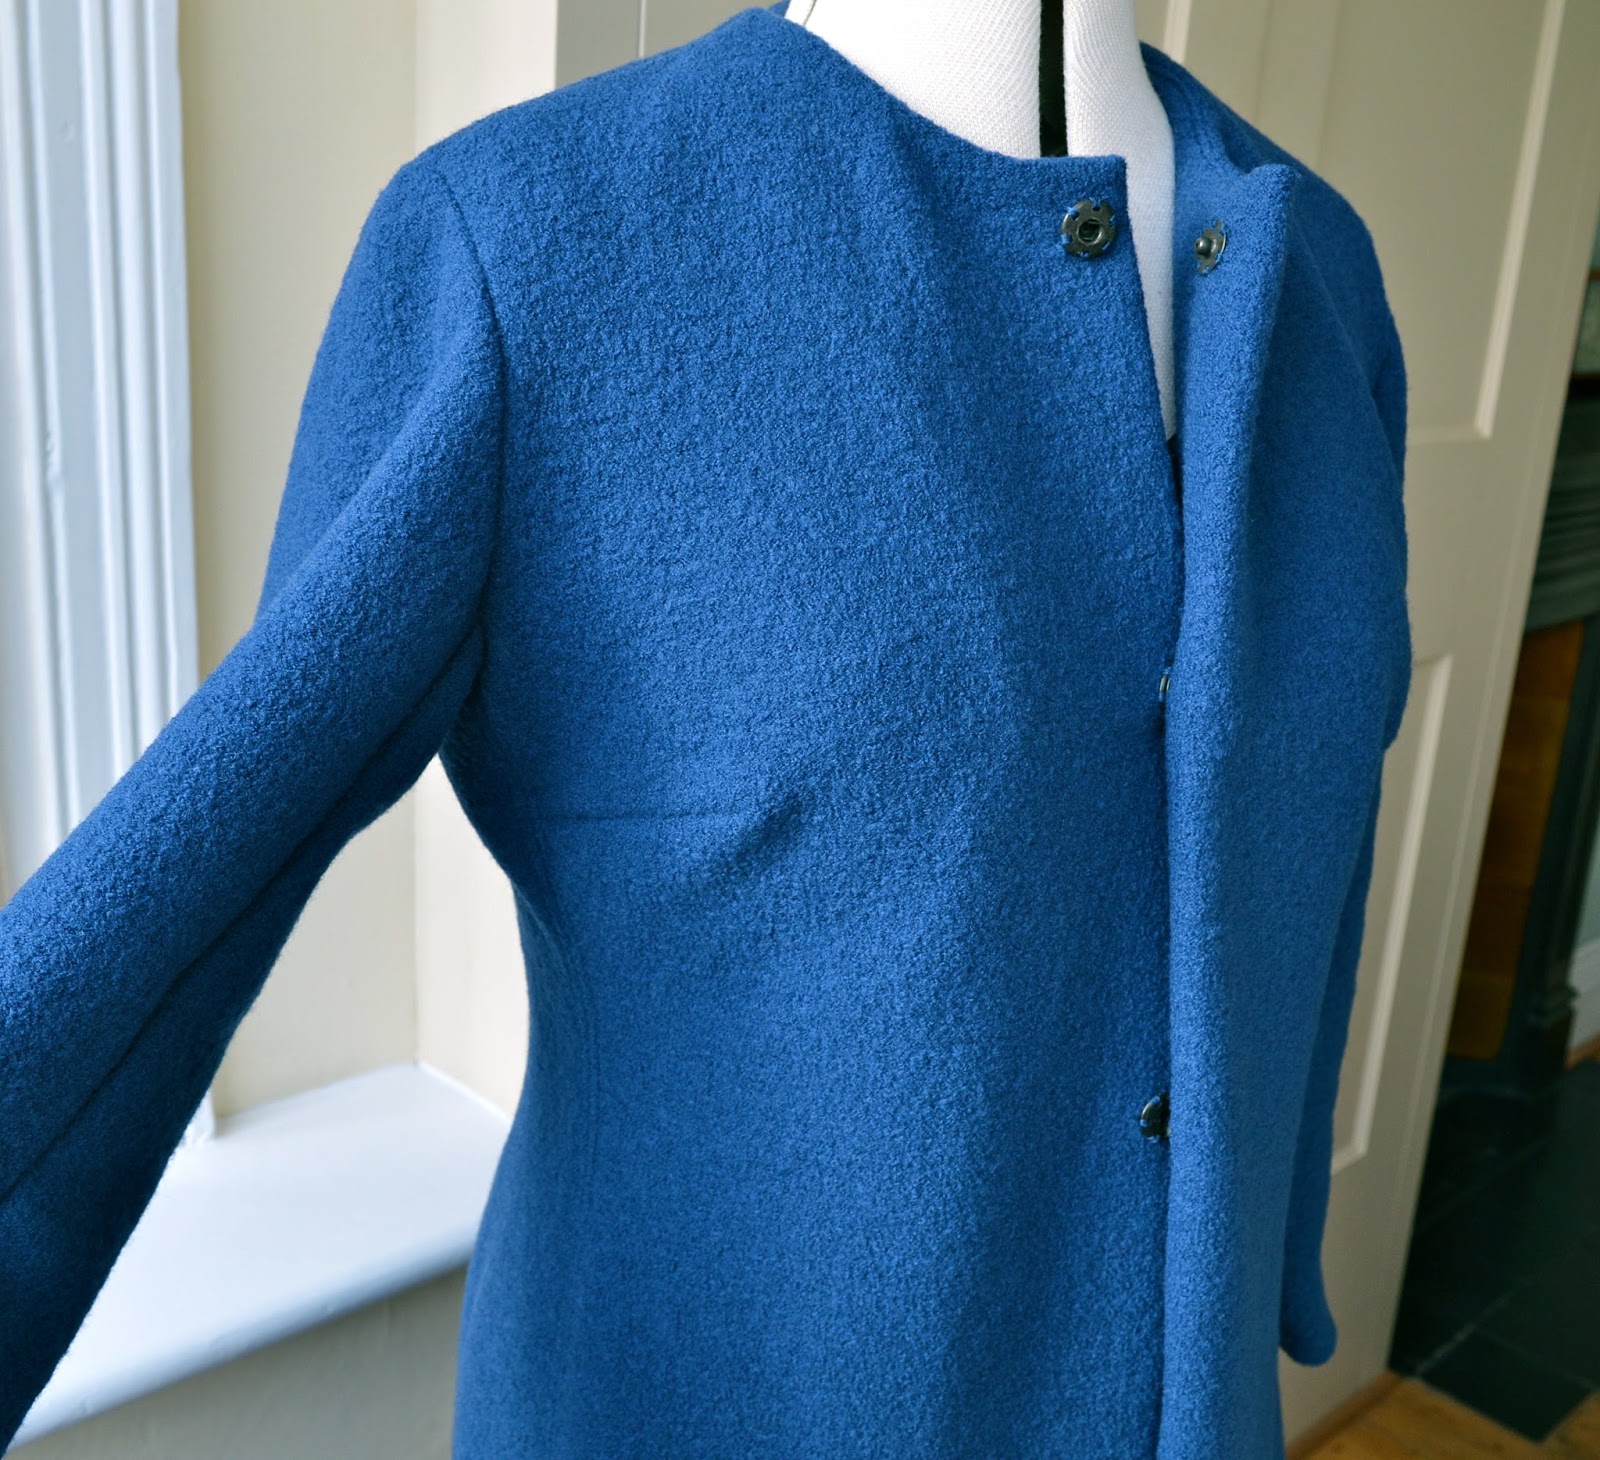
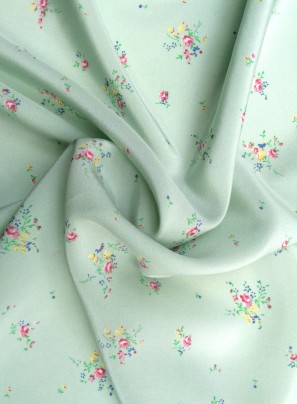
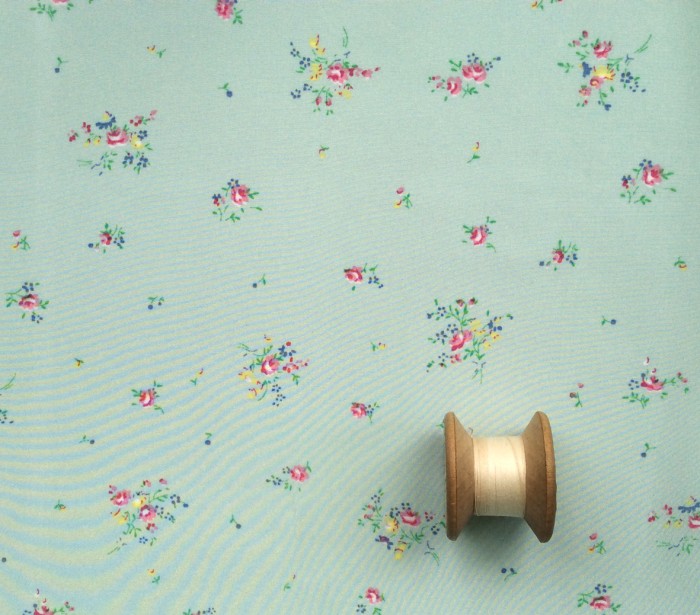
The boiled wool I'll be using is from Dragonfly Fabrics who stock a wonderful selection of colours (see first picture) The choice is almost overwhelming so I requested lots of samples to play with beforehand, eventually settling for Light Grey Blue


This photo isn't really a true representation of the fabric colour - it's much more saturated in real life, a lovely airforce blue. Dragonfly Fabrics are very kindly giving me two metres of boiled wool for my coat, so I hope I can do it justice. I haven't worked with boiled wool before, so asked Dorte at Dragonfly Fabrics for advice on pre-washing. She advised against pre-washing for a coat (I'll probably get it dry cleaned in the future if it needs it) but if I was making a dress or skirt from boiled wool then it can be pre-washed. It should be washed on a wool cycle and dried flat, but be prepared for around 10% shrinkage. 

Although I could probably get away with not adding a lining, I've decided to add one to give the coat more of a professional finish. Having done a bit of detective work in the shops, all the boiled wool coats I saw had lovely, shiny contrast linings, so that's what I'm planning. 

So there you have my boiled wool plans to date. If you've worked with boiled wool before and have any other tips or advice to share, please jump in. My fabric should arrive next week and then the fun begins! Have a good day. x


Vintage Sewing Pattern Pledge 2015

$
0
0


Marie from A Stitching Odyssey has just announced the return of the Vintage Sewing Pattern Pledge for a second year - hoorah! This year she'll be co-hosting it with Kerry from Kestrel Makes which  is awesome. I really like the way Kerry has identified her own vintage style niche (1970's/1980's). It's absolutely NOT an era I would ever like to revisit personally (I had to wear those fashions first time round!), but I'm enjoying seeing the garments she makes from vintage patterns of that time. It's well known that Marie is a big fan of vintage patterns from the 1930's to the 1960's, so by joining forces with Kerry they should have all the major decades covered! Thanks for organising it ladies, I can't wait for your inspiration posts.

The Vintage Sewing Pattern Pledge was one of the few online challenges I joined in with last year and even though I completed the challenge, I have mixed feelings about committing to any kind of numerical target this year. Just to be clear, I love vintage patterns, I'm fascinated by them and can easily lose entire afternoons reading the instructions and scrutinising envelope artwork. I've also sewn quite a few garments from them over the years (19 at the last count). I think my point is that I like to sew from vintage patterns on a whimsy rather than as part of a self imposed schedule. So this year, I'm keeping my challenge very simple. I've got my hands on one vintage pattern that I know for sure I'll sew this year. That's all I'm going to commit to and any extra vintage patterns that manage to get sewn this year will be bonuses! 


This is it - a 1950's tie neck halter top with gathered bust, that crosses at the back and fastens to the front. Why this particular pattern though? Probably because I've been looking for a pattern like this for years. I'm a great admirer of halter necks (as evidenced here) and I think I'll be able to get a good fit on this pattern because of the gathered bustline. The pattern is an ePattern - a reproduction of a vintage pattern in PDF form - that I purchased from Etsy shop Subversive Femme. Obviously I'd prefer to work from the original pattern, but vintage halter neck sewing patterns are like gold dust, so this is good enough for me - I can't wait to work on it once summer's here.

So, whilst I'm on the subject:

I, Jane Marland, will sew up my favourite halter neck vintage sewing pattern during 2015. 

I may even sew it in a polka dot fabric, just for a change! Has anybody else signed up for the challenge yet? I'd love to hear your plans. Happy Sunday! x


Tips for working with boiled wool

$
0
0
I'm getting there with my boiled wool coat. Despite a slight hiccup, my fabric has arrived and is now prepped and ready for cutting, wahay! The slight hiccup is that the beautiful light grey/blue colour I spent about a month deciding on is no longer in stock. Noooooooo! Dragonfly Fabrics checked with their wool supplier and did their best to get their hands on some for me, but there's none to be had. Once I'd finished crying I went back to my vast selection of samples and had another ponder. I was tempted to go for a one-off bright green or turquoise, but I know I just won't wear a coat that colour. The obvious choice was bluewhich is what I went for in the end. Yes, it's predictable, but a blue coat will work with my entire wardrobe and I know I'll get a lot of wear out of it.

Again, the colour's not very accurate, it's more of a petrol blue in real life
In a rare and unorthodox move, I also made a second muslin. I hate making them, and sewing a second one almost killed me, but I'm glad I did as the fit is so much better. I'm sorry I haven't got photos to show you, but my muslin fabric is large scale gingham and I do look exactly like a clown wearing it! All I did for the second one was to scale down to a size 38 everywhere apart from the bust, and shape the waist in slightly.

In order to see what other bloggers had done re the button situation (I've decided to use discreet snaps by the way), I researched the Burda pattern and found two gorgeous versions which have really inspired me. One was from Honig Design who made a very chic, two toned version here. The second was from Sandesh at Bedlam and Bird whose beautifully fitted, Italian wool version is lined with Liberty silk. She also emailed me lots of great advice on construction and supplies, for which I'm eternally grateful - thanks Sandesh! 


I've also picked up lots of great tips for working with boiled wool, some of which were from comments on my last post, so thanks for pitching in everyone! I thought I'd share them here in case anybody else is thinking of working with it. 

TIPS FOR WORKING WITH BOILED WOOL

PREPARATION
As mentioned before, if you're using boiled wool for outerwear, you don't need to pre-wash it. However, my fabric arrived from Dragonfly Fabrics with instructions on pre-treating the wool before cutting. They advised me to steam iron the wool all over from the right side, without touching the fabric with the iron, then lay out flat to cool. I did as directed, and even though I was sceptical (and nearly died of boredom) it worked! The fibres recovered nicely from being folded and there's not a crease in sight.

Some of you also advised me to use the iron sparingly as heat tends to stretch the wool. Flossie Teacakes has written an excellent post about boiled wool here and recommends that you avoid pressing as much as possible. If you must use the iron (e.g. for pressing open seams), then use a low heat.

It's advisable to stabilise the shoulders, neckline and armholes beforehand with twill tape, stay tape or armhole reinforcement tape. This will prevent stretching.


SEWING
Use a ballpoint needle and a longer stitch length. Do check first on a scrap though, as all machines are different.

If you have a walking foot, now's the time to use it! It will deal with thick layers admirably and stop them shifting about, especially useful on longer seams.  

Boiled wool doesn't fray, so seams don't need to be finished. However, to cut down on bulk, it may be helpful to topstitch seams down. This is done by sewing the seams as normal, then lightly press them open (see above!) or finger press if you can. Topstitch both sides of the seam, very close to your original seam line. Or you can topstitch ¼" from the seam line for a more obvious topstitching feature.


CHEAPER ALTERNATIVES
The boiled wool I'm using is a beautiful quality, 100% wool, which I'm aware is not a cheap option. Here are a couple of alternative fabric suggestions recommended by readers:

Washed Wool: this is a 50% wool, 50% viscose mix. It's a medium weight, densely knitted fabric, similar in appearance to boiled wool. Stocked by Ditto Fabrics in ivory or burgundy.

Italian Melton: 70% wool, 30% polyester. This fabric is thick (520gsm), but with lovely drape. Stocked by Fabricuk.com in a variety of colours.

The following fabric hasn't been recommended by readers, but it's another cheap option.
Loden Boiled Wool: Roughly 70% wool, 30% polyester. Quite lightweight and stocked by Myfabric.co.uk in lots of colours here.


I hope you find these tips useful and as always, if you have any to add, please let me know in the comments section. Have a wonderful weekend! x


Sewing by the rules

$
0
0
For the past week I've been making another Mortmain dressby Gather Kits. This time round though, it's not for me - it's a sample for Badger and Earlto publicise a future Mortmain dressmaking class. My brief was to sew it up exactly as instructed in the pattern, but once I was making it, I realised it differed quite a lot from the first version I made, back in the summer.

The Mortmain dress

I'd always thought I was quite an obedient type when it came to following pattern instructions, but in reality, that's not the case. Here's what I did differently the first time round, when left to my own devices:

1) Box pleats sewn the reverse to what was instructed in the pattern i.e. pleating from the right side of the fabric rather than the wrong side. To be fair, this is suggested in the pattern as an alternative so I wasn't being a complete rebel!

This is how I made the pleats originally….
….and this is the sample showing what they should look like. It's actually quite a subtle difference
2) Invisible zip used instead of the exposed metal zip which is a feature of the pattern. I'm still on the fence about exposed zips, especially in such a feminine dress. Personally, I think they work better on more robust looking garments. Still, I learnt a new skill whilst making the sample (how to insert an exposed zip), which I'm pleased about, and I think the zip does look good, I'm just not sure if it's for me!


3) Armholes finished with bias binding instead of the self fabric facings in the pattern. I realise that armhole facings need to have a bit of width to them to sit nicely, but I still prefer the neater, trimmer finish when using bias binding. The compromise is that bias binding doesn't give you the seamless finish you get with facings (unless, of course, you catchstitch it down by hand, which has never worked successfully for me).

Admittedly, you do get a lovely clean finish on the armholes with a facing
I also added interfacing to the waistband pieces and underlined the entire dress, but that was more down to fabric choice than me being a maverick! They're not big changes by any means, but I'm surprised there were so many of them - in my head, I thought I'd sewn up the dress more or less exactly as the pattern dictated (minus the zip). I didn't think I was such a madam with my sewing!  

When I first started sewing I slavishly followed sewing patterns exactly as written, terrified of deviating in case it all went horribly wrong. Over time, I've learnt that if a design detail doesn't rock your boat or you know of an easier/neater/faster way of getting the same result, then it's a no brainer to make a few changes to the pattern. Plus, I'm all for putting your own stamp on things! The obvious exception to this is pattern testing, where the whole point of the exercise is that you follow directions exactly to check they make sense.

I suppose the more confident you become with your own changes, the more you're inclined to start pattern hacking left, right and centre. Using the bodice from one pattern, the skirt from another and even the sleeves from a third can produce wonderful results! 

I'd be interested to know where you stand on this. Do you obediently sew by the rules and never deviate? Or do you slash, hack and mix up your patterns to your heart's content?!  x 

Come sew with me!

$
0
0
I'm delighted (and a tiny bit scared!) to announce that I'll be teaching a Mortmain dressmaking class at Badger & Earl in Chiswick. Yayyyyy! The class will run on two consecutive Sundays in March (15th and 22nd), where I'll guide you through each step of sewing up the sleeveless version of this lovely, vintage-inspired dress. Further class details and booking information can be found here


I recently taught a one day PJ bottoms class at Badger & Earl for 12 year old girls, which was so much fun. Now I get to do it again, with one of my favourite patterns! I've made the Mortmain dress twice now, once for myself (my lemon dress) and once as a sample for the class. For those who were interested in the fabric I used for the sample, it's Poppin Poppies in clover, which is part of the Avant Garden range by Momo. The Village Haberdashery still have it in stock here.  

Lemon dress

Sample dress 
The Mortmain dress is a classic shape with a fitted, darted bodice, separate waistband and box pleated skirt. It also features an exposed zip to the back. Some of the techniques involved are a little involved, so I'd say the class is suitable for an ambitious beginner. If you already have a couple of simple dressmaking projects under your belt and are looking to expand your skills, then this could be the perfect class for you. 

Here I am proudly showing off the dress at Badger and Earl!  Wish me luck! x

My legs aren't really that short - it's the camera angle!


Finished: Boiled wool coat

$
0
0
As of today, I'm the proud owner of a boiled wool collarless coat! I took my time making it, and apart from a couple of niggles, it's more or less exactly as I imagined it would be. It's an open coat i.e. not designed to have fastenings, so it's pretty casual, almost like a long cardigan when worn with jeans. The classic lines means it can also be worn with a skirt and heels and still look good (no photos of it styled this way I'm afraid, but trust me, it looks nice!). 


Annoyingly, the collar's twisted on this shot, but you get the general idea
The pattern I used (a Burda PDF which I talk about in this post), was well drafted and I really like the fit of the coat. The instructions, on the other hand, left a lot to be desired. Burda aren't exactly well known for the clarity of their instructions and the lining paragraph made no sense whatsoever! It was pretty easy to work out what to do though, and at a bargainous £3.99, I still think the pattern is good value for money.


In terms of fit, I sized down to a 38 everywhere except the bust area (which remained a size 40) as I wanted a slimmer fit, I shortened the arms by 1.5 inches and the overall length by four inches. I also shaved ½ an inch off the shoulder height. This resulted in the sleeve head being a bit too full and puffy for my liking. I knew this would annoy me, so I reduced the amount of ease in the sleeve and redrafted it using this methodA pain to do admittedly, but worth the effort in the end.


So what was the boiled wool like to work with? Well, I had high hopes of working with it and it didn't disappoint. As per the advice of my readers and my own list of tips, I used a ballpoint needle, a longer stitch length and a walking foot. The walking foot proved to be an absolute life saver - layers of boiled wool can quickly resemble a shag pile carpet and it really did help chomp through all the layers with ease. It also helped stop the layers shifting about - essential once the silk lining was in place. Because boiled wool is quite a bulky fabric, I top stitched either side of the main seams and trimmed the seam allowances back. I really should have used a pair of duck-billed appliqué scissors for this job (read a great explanation of their use in this post of Kerry's), as I was in serious danger of snipping through the main fabric. In fact I'm amazed I didn't! Stitches do tend to sink into the fabric though, which makes unpicking them a long and tedious process, so it pays to go slowly for an accurate finish.  Top stitching everything down also uses a LOT of thread - I went through three spools altogether. 

You can see one of the top stitched seams in this shot
I picked up the lining fabric from Classic Textiles in the Goldhawk Road. It was sold to me as Liberty silk, but unlike the other Liberty silks I could see, there was no Liberty of London mark on the selvedge. My immediate thought was, "Liberty silk, my arse", but I decided to give them the benefit of the doubt and look up the design. Imagine my delight when I found it actually was a Liberty Silk! The design is called Kilburn Rose and it's part of a 2013 range designed by actress Tamsin Grieg! Whoops, soz for doubting you Classic Textiles, I take it all back! 

Liberty Kilburn Rose silk lining
I love the colours in the lining - they complement the blue of the boiled wool perfectly - and the vintage style of the roses are so me. I should have guessed it was a Liberty fabric as it was such a pleasure to work with, it doesn't fray much and has a beautiful, silky drape to it. At £12 a metre, it's more than I would normally pay for a lining fabric, but for Liberty silk, it's a bargain. I only needed 1.5 metres so I think the investment was worth it. To make the sleeves easier to slide on and off, I lined them with plain green lining fabric, which, in comparison, was a complete nightmare, forever fraying and sliding around! 

Aside from the main fabrics, I used a washable supersoft interfacing from The English Couture Co on the facings, and stay tape on the neckline, shoulders and armholes to prevent them stretching. I also added a couple of sew-on press studs to the front of the coat - I'm not sure if I'll need them but at least they're there if it gets windy! I barely used the iron whilst making this coat as I was scared of stretching the wool, I found that finger pressing the seams into position before top stitching was all it took.


It's an almost perfect make: one of the sleeves drags up at the back slightly where I've attached the lining, and the top and bottom of the facings misbehave a bit. No amount of restitching seems to make any difference, so I'm just going to forget about them. I still have a gorgeous, warm, classic coat that's going to get a LOT of wear.

Have a great weekend everybody!

Coat fabric was given to me free of charge for review. All views my own.


White Russian Sweatshirt - Jane style

$
0
0
It's been COLD in London recently. So cold in fact that three layers often aren't enough to stop me whingeing.  So when I saw that Emmie was selling off some sweater knit from her stash, I snapped it up. The intention was to make another Bonnie sweater, but lengthen the body a little to keep out the chill. I obviously wasn't paying attention to the description (fleecy insides, tubular knit) because when it arrived I realised it was actually a sweatshirt knit - which as we all know is a very different beast.

Sweater knits for the Bonnie pattern need to have 40-50% stretch which, even yanking it as far as I could, I was never going to achieve with a sweatshirt knit. Sweatshirt knits are far more stable and bulky, with surprisingly little stretch. All was not lost however, I liked the colour - a deep, forest green - and the fleecy, warm insides of the fabric were very tantalising. I would make a sweatshirt instead. I've never made a sweatshirt before and don't own any patterns, so after perusing what was on offer I settled on the White Russian sweatshirt by Capital Chic Patterns. The pattern is designed specifically for sweatshirt fabric which was exactly what I wanted - no faffing around trying to guesstimate stretch percentages. The pattern also comes with suggestions to use pre-quilted jersey fabric or customise with an appliquéd initial (very, very unlikely) or one of the animal head templates included (never in a million years!).


I chose my size(s) according to the finished measurements, cutting a 12 at the top and a 10 for the bottom half and the sleeves. From cutting out, the top took me just 1.5 hours to sew together. Half of that time was spent sewing up the basic raglan-sleeved sweatshirt, the rest was spent sewing the neckline, cuffs and hem bands which were a bit more fiddly. Capital Chic patterns are written with intermediate sewers in mind and this is reflected in the instructions. They're clear and to the point, bang, bang, bang, with no unnecessary flannel, which I quite liked. There's no mention of pressing anything in the version I made, the assumption being that you should already know to press seams and pieces for a professional finish. Unless you're me that is….it was only after trying to attach a cuff that curled in all directions that I realised a bit of pressing wouldn't go amiss!

First version - not really me

Showing boxiness whilst doing a monkey impression 
The finished waist measurement is the same as the finished hip measurement, which results in quite a boxy fit. This relaxed fit might work for some people - just not me and my obsession with a nipped in waist. I could have worn it as it was, but knew I'd feel frumpy in it, so I made a few changes:

Shortened sleeves (what's new?)
Shortened body 
Sorted out boxy fit
Removed cuffs and waistband (I just didn't like them)

I  fiddled with the first version and ended up totally ruining it in the process (I chopped the cuffs and waistband off which resulted in the sleeves and body being way too short, whoops!) I had plenty of fabric though, so cut a second version. This time I omitted the cuffs and waistband, just adding half an inch to the original body to allow for a hem. I also tapered in the side seams quite significantly to create a definite waist.  

The sleeves are the correct length when they're not twisted! 
The result may not be to everybody's taste and it certainly moves away from the original sweatshirt look of the pattern. It works much better for me though, and the changes I made will ensure I actually wear it. More importantly, it's soooo cosy and warm! Next up, shirt making. Woo hoo! x


All about bark cloth

$
0
0
If you've got a soft spot for vintage fabrics then you've probably come across barkcloth at some point. I often see it at vintage fairs and on vintage fabric websites, but have never used it or indeed owned any. So when I saw that Annie from The Village Haberdashery was stocking a new collection of organic cotton barkcloth I really wanted to get my hands on some. The collection is called Time Warp by Jessica Jones and is made up of  four mid-century-inspired retro prints. I love the patterns she's chosen for the designs, I think they look very Orla Kiely-esque and the colours are great. 

Sunburst in blue

Loop in pink

Quadrant in pink

This is the one I've fallen for:

Ripple in navy
Annie has very generously gifted me a metre of barkcloth to review, which I'm ever so slightly excited about! Before I start working with it, I thought I'd do a bit of research, so if you're interested in a potted history of barkcloth, read on! 

What is barkcloth?
Barkcloth in its original, primitive form was made from the inner bark of trees found in the South Pacific and surrounding areas. The bark was soaked, then beaten into a paperlike fabric which was then dyed, printed or painted.
The barkcloth we're familiar with today is a cotton fabric made from densely woven fibres. It’s the texture of the cloth, rather than the fibre of the fabric itself which gives it its distinctive appearance. Barkcloth doesn’t appear to have a wale (rib) or distinct weave effect, which results in a rough, textured appearance reminiscent of tree bark.

From SportSuburban on Flickr
An early incarnation of the fabric we now know as barkcloth was produced in France in the 1920’s using cotton mixed with rayon. This woven cloth with a rough, nubby texture was known as Cretonne. By the late 1930's barkcloth was being manufactured in America and was especially popular in Hawaii. GIs and sailors stationed there during the Second World War often sent barkcloth home after seeing it used in home furnishings and shirts. Common designs were florals, botanical prints, tropical prints (especially hibiscus flowers and other native plants) as well as geometric and abstract 'atomic era' prints. 

Source
From barkclothhawaii.com

From barkclothhawaii.com

The dense weave and durability of barkcloth made it a popular choice for curtains, cushions and upholstered home furnishings from the late 1940s to the 1960s.

Source

Cushion by Carol Seatory

Cushion by Carol Seatory

The vibrant, bright designs and durable texture and weight also make it a perfect choice for accessories. 

Source
Source
Barkcloth is less commonly used for garment making, but some of those awesome prints are just crying out to be made into clothes. I love this beautiful barkcloth dress…

Source
…and this skirt worn by Emma at The Fiercest Lilliputian is the perfect showcase for an amazing print.


I fully intend to use my bark cloth for clothes making - a skirt to be exact. The fabric actually has quite a nice drape to it, it's just the textured appearance which makes it look stiffer than it is. I'll keep you posted on my progress.

Have you ever made a garment from barkcloth? Or do you have an amazing vintage piece in your stash? Please tell! x


Sewing out of season

$
0
0
I don't know about you, but when the weather turns cold I tend to do two things on the wardrobe front. Firstly I sew a few functional, knit garments. Then I make a trip to Uniqlo and stock up on merino wool sweaters and cardigans. This fills any gaps that might have occurred after my ruthless autumn wardrobe culling, and I can finally feel warm again. Job done. As I've mentioned before though, I find blogging about functional clothing deeply boring and try not to do it too often. I only blogged about the White Russian sweatshirt because it was a new-to-me pattern. 

It gets to the point when you realise enough is enough. I've had my fill of cold weather sewing - I want to sew pretty tops and skirts, and work with lovely cottons and linens rather than knits. I want to make button up sleeveless tops and shirt dresses. So that's what I'm going to do. It may be a while before any of them actually get worn, but who cares?! Here's what's going to be on my sewing list over the next few weeks:

I've always wanted to try and draft my own version of the 1950's inspired shoulder tie dress that Casey made a few years ago.  I LOVE that particular shoulder detail and it will be a good opportunity to work with my bodice and skirt blocks. The shoulder ties are similar to the ones on this vintage pattern.


If you're interested in making a 1950's style sundress yourself, her excellent tutorials can be found here (part one) and here (part two).  I think I have just enough of the pretty Japanese lawnleft over from mytoned down bow blouse to make a dress.


Ever since pledging to make just the one pattern for the Vintage Sewing Pattern Pledge, I've suddenly got a burning desire to sew with vintage patterns. Talk about contrary! 


So as well as the vintage halter neck I pledged to make, I have plans to make another Simplicity 4238 using my double-sided double gauze (now there's a mouthful!) that I talked about here.


My navy gingham version is about to die on me and I need at least four versions in constant rotation through the summer or I start panicking! What can I say? I love that pattern so much!

And finally I'd like to get on with a spring shirtdress using my lovely Hemingway Designs fabric.


I have all these ideas racing around in my head and the fabric to make them with so I've decided to pull myself out of my sewing rut and just go for it. Can't wait, can't wait, can't WAIT! x


Ghost in the machine

$
0
0
Let me tell you a story involving a lightbulb and an overlocker. No, please stay! It gets a bit more interesting than that, I promise! A little while ago, the bulb on my overlocker stopped working and needed replacing. Being the dynamic go-getter that I am, it only took me nine months to get round to ordering a new one and bracing myself to change it (I'm not practically minded). To get into the lightbulb area I had to remove a section of overlocker, which meant a trip to the kitchen to find a different screwdriver. It also meant removing the thread cones, so it was all a bit of a rigmarole. Imagine my surprise when I finally got the cover off to discover there was no lightbulb in there after all. Hmm, 'where was it?' I wondered. At that moment, just like in a ghost story, a used lightbulb rolled across my sewing desk and came to a stop by my hand. I kid you not. Where the hell had that come from??!! The logical explanation was that Jon had removed it whilst waiting for me to order a new one, so I tackled him about it as soon as he got in that night. Nope, he hadn't touched it. In fact he wouldn't DARE take apart my overlocker without my permission. I believed him.

The culprit….
So how had the lightbulb removed itself from the overlocker??? I have absolutely no recollection of doing it. Surely I'd remember hunting down a special screwdriver, removing cones etc? Plus there was a thick layer of undisturbed dust on the back section which my slatternly housekeeping skills hadn't touched for years. There can only be two explanations. Either I'm totally, utterly losing my marbles (highly likely) or….. I have a sewing ghost!!!  I really hope it's the latter, and if it is a ghost, then it's a helpful one. I could leave out bits of unstitched pattern pieces for it to sew overnight, just like in the Elves and the Shoemaker. Better still, I could leave out hooks and eyes for it to sew on!  Sadly I think it's probably me getting old and having a complete memory lapse.

Has this kind of thing ever happened to you? Or is it just me going bonkers? If you did have a sewing ghost, what hideous tasks would you leave out for it to sew?!  Have a good day! x


A springtime Granville

$
0
0
If you were looking forward to reading a long blog post all about Granville - Arkwright's long suffering nephew from Open All Hours - then I'm sorry to disappoint you. This post is all about shirt making, and one shirt in particular, the Granville pattern from Sewaholic. I couldn't resist adding a picture of Granville though, look at his little face! And his Fair Isle tank top!


Despite admiring Sewaholic's patterns from the sidelines, I've only sewn a couple of them (the Pendrell, Renfrew and Alma). There always seems to be some little detail about their patterns that I don't like, or I don't think will suit me and I haven't actually bought one for ages. The latest releases were an exception - as soon as I saw the Granville pattern I knew it had my name on it. A classic, fitted shirt with princess seams to the back and shaping to the waist to give it the fitted look I'm always after. I bought the Granville as soon as it was released.

Alice at Backstitch had also recently asked if I'd like to review some fabric, so I saw this as a good opportunity to try out a nice, crisp cotton. I settled on one of the Timeless Treasures Sketch fabrics in Red. I love a crosshatch design and this particular colour has a really subtle, crosshatch finish. If you like your crosshatch a bit bolder, then Cherry might be a better choice - it's a bit more obvious.  The fabric is a good match for this pattern. I wanted something lightweight enough for a shirt, but crisp enough to hold the shape of the collar and stand. It's just the right weight and washes and presses perfectly. I also like the fact that it looks like a plain red fabric, until you get closer and notice the crosshatch detail - fancy!


I found the clear buttons in my button box and couldn't work out where they'd come from (maybe the sewing ghost put them there?!) Then I remembered - they were from an old duvet I'd thrown out. Not quite the classy lineage I'd imagined!

When I've made Sewaholic patterns before, the fit has always seemed pretty good on me initially. I'm the opposite of the pear shape that Sewaholic patterns are drafted for, so I've always used my bust size and graded down at the waist and hips. When I'm wearing the tops, I've noticed that the bust often feels a bit tight and constricting. So this time round I took a tip from Mary over at the Curvy Sewing Collective and altered the front bodice piece accordingly. I traced a size 8 for my bust and waist, grading down to a size 6 at the hips and added a one inch FBA (full bust adjustment) using Mary's excellent tutorial. This gives more room in the bust but retains the lovely shaping at the waist and hips. I also shortened the whole pattern by an inch.


The other change I made was to convert the sleeves from long, cuffed ones, to short. A bit drastic, but I just don't wear long sleeved shirts. Ever. Short sleeves are much more practical for me and the fact that I made mine without a cuff or sleeve band means I can still just about get away with wearing them underneath a cardigan. 


As far as contraction goes, I found some areas a little challenging. I should point out that I've never actually made a proper shirt with a collar and collar stand before, I've made plenty of shirts with notched collars and flat collars, but not this sort - so it was a bit of a departure for me. The written instructions were adequate, but I would have liked a bit more direction in a few places, notably when you add the button bands and sew the collar and collar stand. I felt that the diagrams weren't that clear, and once or twice I actually found them misleading. I figured it out in the end, but it wasn't an easy process! Putting together the basic shirt, yoke and buttonbands was pretty quick once I'd worked out where to fold the front bands. The collar on the other hand, took almost an entire day to get right! Maybe it will be an easier process next time round when I know what I'm doing?!


The inside yoke has a lovely clean finish - luckily I found the instructions for that bit to be perfectly clear! All the seams are pressed together and overlocked before being topstitched. It's worth taking a bit of time with your topstitching as it does give a professional finish to the shirt. especially round the pesky button bands and collar areas.


Fit-wise, I'm pleased to report that the FBA was a complete success, there's plenty of room across the bust but the shirt still remains fitted because of the shaped waist. I could kick myself for not paying more attention to the button placement though. I usually use this tutorial, but decided I knew better this time round. Clearly I didn't, as there's still a bit of gaping. Gah, so annoying, especially as the rest of the shirt is near perfect! The one fitting change I'd make next time would be to move the bust dart up by about an inch. I did measure it before I did the FBA, but something obviously got lost in translation as it ended up a bit low.


Whingeing aside, I do like the shirt a lot and I would definitely recommend the pattern. It's beautifully drafted and I think the classic style would work with lots of different body shapes. Believe it or not, I lack a plain, red top in my wardrobe, so this simple shirt will go with everything: jeans, skirts, shorts, trousers. I love how it looks untucked too, it's just the right length! I'm so pleased to have kicked off my summer sewing with such a wearable shirt! Next up, something in barkcloth I think...

Fabric was given to me free of charge for review. All views my own.


Mother's Day gift idea

$
0
0
Stuck for something to give your mum on Mother's Day? Why not go the handmade route and make her a cute holder for her mobile phone? 


My step-by-step tutorial for making one is this month's featured tutorial on the Elephant in my Handbag blog. It's a nice, straight forward project to make and a great way of showcasing two contrasting fabrics. I used a pretty floral with a blue star fabric for my tutorial, but I think it would work well with one of the gorgeous Suffolk Garden flower prints too.


Or maybe your mum has similar taste to me and nothing makes her happier than a fruit print?! Given the choice I'd go for the green pear print every time!  


If you'd like a few more ideas for handmade Mother's Day gifts, have a look at my tutorials page. Handmade Lavender Bags always seems to be a big hit with mums and they're sooo easy to make! 


Happy crafting! x

Fashion with Fabric book review

$
0
0
Just as the Great British Sewing Bee seems to have evolved as a TV series (more challenging tasks, contestants working with a variety of different fabrics and techniques etc), so too does the accompanying book. I reviewed the book for the first series here and was mostly positive about it, my main criticism being the lack of patterns included. I was recently asked to review the book for the current series - Fashion with Fabric - and wow, what a difference a couple of years makes!


The focus this time is on the fabrics used, which makes for a surprisingly interesting read. The book is split into four main chapters based on the most widely used and popular fabrics: cotton, wool and other animal fabrics, stretch fabrics and luxury fabrics. The reader is encouraged to use the book as a starting off point, then experiment with their own ideas, which I think is a great approach to take. Lots of projects also have 'hack' suggestions, some of which are improvements on the original pattern in my opinion! Each chapter also contains advice and tips on working with these different fabrics, which I found really useful.


Unlike other pattern books (and I include the first GBSB book here), there is a comprehensive section of the book dedicated to adjusting patterns for an accurate fit. As well as standard bust, waist and hip measurements, the reader is told to take a high bust measurement to determine whether a full or small bust adjustment is required. It then shows you how to do one. This is such an important fitting step for a lot of women, yet it's only ever skirted around in a lot of books. There's also advice on moving darts, broad or narrow back adjustments and a page of useful tips on fitting trousers and fiddling about with crotch depths and lengths. The author - Claire-Louise Hardie - has years of experience as a theatrical and costume designer and runs her own sewing school. She's also the sewing producer for the show and this working knowledge absolutely shines through in the book.


There are 30 projects in the book, including a few from the series to date (Capri trousers, Walkaway dress, men's kilt and curtain skirt), and a couple of men's and children's patterns. For those who want to get their teeth into more challenging projects, there's a corset dress (with bustier hack), a leather jacket and the afore mentioned kilt. The patterns come in a separate pack, which in my case anyway, will actually encourage me to use them. Patterns that live in the back of books tend to get easily forgotten in my world, but if they're in a separate pack, they can live with my patterns! The patterns are full sized but need tracing off as there are several on each sheet. This isn't the headache it sounds as they're all clearly marked and colour coded - nothing like a Burda magazine!  The women's patterns come in seven different sizes ranging from size 8 (32 ½" bust, 25 ½"waist, 36" hip) to size 20 (45 ½" bust, 38 ½" waist, 49 ½" hip)

Of the patterns themselves, there are several that I'll probably try out at some point...

… the sleeveless shell top ...


… the silk woven tee ...


… and the sleeveless collared blouse.


I also like the look of the Capri trousers, despite the hideous example the poor model has to wear in the book…


There are some patterns that I can admire from afar but will probably never try: the men's kilt is one - although I'm tempted to make it for the sole reason of getting Jon to model it! The drapey knit dress is another as it's so far removed from my personal style. I can admire it on others who CAN rock that style though, I'm thinking specifically of Karen's version from Did you Make That? Simply stunning.


I've been keeping one final pattern up my sleeve  - the lace pencil skirt - as it's one I've already made!


I kept coming back to it in the book and in the end just decided to give it a try with some leftover fabric from mylace top. For the underskirt I used a sea-green lining fabric previously used to line the sleeves of my boiled wool coat, so all in all, a good stash busting exercise! The skirt is a simple, elegant shape with no front darts, an invisible zip and a facing. I only ever intended it to be a practice run to test out the pattern, but I think the finished version is totally wearable. I also made it before this week's episode of the GBSB and let me tell you, I could NEVER have finished it in 3 hours or however long they were given. Hats off to the semi finalists!


Using the finished measurements as a guide, I made a size 10 with no adjustments, and the fit is spot on. The two skirt layers are made up separately, but attached around the zip as a single layer. They're then treated as two separate fabrics below the zip. It's a brilliant technique which I'll definitely use again. I also used hairline seams for the first time, where the seam is stitched, narrowly zigzagged and then trimmed. A hairline seam is a good choice for sheer fabrics and it worked well for my lace overskirt, creating a very light finish.


I'm amazed by the number of excellent tips and techniques I've picked up from reading this book - I learnt two new ones just from making a simple skirt! I'll keep you updated with anything else I make from it, but so far, it's shaping up to be one of my favourite sewing books to date.

'Fashion for Fabric' was given to me free of charge for review by Quadrille Publishing. All views my own.


Silk crepe de chine madness

$
0
0
I briefly lost the power of rational thought at the Knitting and Stitching Show last week. Not quite to the same level as the lady next to me who had four carrier bags of wool and was mumbling, "I didn't really need any wool"… but still! I stumbled on a fabric company I'd never heard of before and fell head over heels in love with everything on their stand. The company - Til The Sun Goes Down - produce a unique collection of beautiful dressmaking fabrics in limited edition prints. Most of the fabrics I saw were silks, satins and rayon, all inspired by vintage prints from the 1920's to the 1960's and all absolutely breathtaking.


I kept leaving and looking at other stands, but my feet kept bringing me back to the stall and to one fabric in particular - this beautiful aqua posy print. I had a vintage inspired blouse made from a near identical print about twenty years ago. I loved that blouse and was devastated when I caught the front on a nail at work (god knows how) and ruined it. 


I caved in eventually and bought a metre. The fabric is a lightweight silk crepe de chine with a slight sheen to it. It's also eye-wateringly expensive (£36 a metre), which is the most I've ever spent on fabric, but it was the only thing I bought, so I'm telling myself that justifies the expense. I have big plans for it anyway - I want to recreate my nail-shredded 1930's style blouse! With fabric this special I don't want to mess about with an unfamiliar pattern, so I'm going to use vintage Simplicity 2844 which actually dates from the 1930's and which I've made twice already (here and here.) 


It has some lovely vintage features such as gathered shoulders and a back yoke and I think it's a perfect pattern for my precious fabric. The crepe de chine is very fragile - recommended garments to make from it are French knickers, camisoles and slips! - so I'm going to fully underline it with white silk cotton. This will make it a little more robust, especially for areas like buttonholes. It will also boost the colour too as it currently looks a bit grey rather than aqua next to my super pale skin.

I'm going to consult my new sewing bible - Fashion with Fabric - for recommendations on sewing with silk. I'm also wondering whether it's worth using silk thread for this blouse? If anybody has any thoughts on this or on working with crepe de chine in general, I'd love to hear them.  x


Barkcloth skirt

$
0
0


Behold my barkcloth skirt! I wanted to make a relatively simple garment to show off the lovely retro fabric design as much as possible, so decided on a vintage pattern from the 1950's. The pattern is Simplicity 3983 which has just the one seam going up the back, so no worrying about pattern matching side seams. As you can see, I didn't make much of an effort to match the shaped pockets and front waistband either. I don't care though, it looks fine!


Having already made this skirt once before, I only made one pattern change, which was to shorten the length by an inch (I'd already taken a gigantic eight inches off the original pattern). I also made a few changes to the construction. I replaced the centred zip with an invisible one and added a faced waistband instead of a Petersham ribbon facing, which is how I finished the waistband on my first version. I also positioned the zip so that it runs through the waistband (like you find on the Delphine and Ginger skirt patterns). I know some people like a waistband starting above the zip, but I personally prefer them integrated. It's not authentically vintage but I like how it looks.


I added a white silk-cotton lining using this method, and used some scraps of cotton lawn for the pockets.


The barkcloth fabric is Ripple in Navy from The Village Haberdashery, part of the Time Warp collection by Jessica Jones. Here's what I would advise if you're thinking of working with barkcloth:

- The feel of barkcloth is quite rough against the skin, so if you're planning on using it for garment making, I'd advise underlining with a very light fabric or adding a separate lining.

- Barkcloth has quite a loose weave and is liable to stretch slightly when cut on the bias. This happened with my curved front pocket facings, but it actually turned out in my favour as they now allow a bit more room to get my hands in!  Just be careful to staystitch any curved edges and try not to over stretch when pressing.

- The fabric frays and unravels quite noticeably, so I ended up overlocking all raw edges quite early on in the proceedings.

Apart from that it didn't behave any differently from a linen or cotton. I used a regular needle in my machine and it sewed together beautifully. Even though I knew the fabric was brand spanking new, I still felt like I was working with a piece of 1950's barkcloth, it just looks vintage!


I'm delighted with the finished skirt - it's contemporary but the fabric gives it a vintage edge, which is my favourite combination! I've paired it with a jumper for these pictures because it's still cold and I'm a wuss, but I can totally see it working with this, this, this and even this!!

And because I used a vintage pattern, I'm counting this as my first contribution to this year's Vintage Sewing Pattern Pledge. I only pledged to sew up one pattern, but it's not this one, so consider this a bit of a Brucie Bonus!  x


Fabric was given to me free of charge for review. All views my own.


Tie by Joe

$
0
0

Today I have another gent-in-a-tie combo on the blog and it's not even Christmas! Let me introduce you to my friend Joe Alessi - actor, bon viveur, devoted uncle and snappy dresser. I've known him since I was 16, which will be 30 YEARS AGO this year. god that makes me feel old! Anyway, here we are in about 1987, when oversized baggy T shirts were flavour of the month…. 


…and here we are during OWOP last year outside Liberty. Thankfully we've both scrubbed up a bit in the intervening years. 


When I posted about my tie making adventures at Christmas, Joe was super keen on the idea of making a tie himself, so last week he came over for a fabulous day of sewing. And cake eating. And visiting the allotment. And looking at old maps with Jon (what is it with men and maps?!) Amidst all this high octane excitement, we did eventually find some time for tie making and let me tell you, he's a natural!  I should point out that his dad was a tailor so it's in the blood, but still, he was fab.

Pinning the pattern to the fabric - note the sophisticated pattern weights
For fabric he chose a Liberty-esque floral lawn from Classic Textiles on the Goldhawk Road. The fabric is a lovely weight, with a bit of a silky hand to it, so perfect for a tie. In fact it's much better suited than the quilting cotton I used for Jon's tie, which looked bulky by comparison. For the pattern, we used Sew Over It's Tie Making Kit, with the following small changes:

Increased the length of the back tie piece and the back lining piece by 10cms. This matched the length of a RTW tie Joe had brought along for comparison. 

Decreased the width of the back neck section by about 5mm on either side, as it overlapped his shirt collar. Well, we drew the changes onto the pattern, but were too busy chatting to actually cut along the lines. Whoops! It's a change he can implement on his next tie in any case!

First seam!

Here it is later, all pressed and gorgeous
We'd ran out of domette, which is the special tie lining that comes with the kit, so improvised and used a double layer of cotton flannel instead. Personally, I think the flannel is an improvement as it's not quite as springy as the domette. Pressing the tie into shape around the lining is the only slightly tricky part of the whole proceedings. You've got to line it up perfectly in order to get that central line down the back of the tie. Look at that furrowed brow concentrating! If he was a toddler he'd have his tongue sticking out.


By the time Joe left, all he had to do at home was invisibly catchstitch the central back seam, which he did beautifully.


Look! A 'Tie by Joe' label.  I'm not going to lie, when he sent me the final photos of his tie, all perfectly stitched and labelled, I totally blubbed (it doesn't take much!) Just look at it though - it wouldn't look out of place in Liberty or Paul Smith, I'm so bloody proud of him! He's got fabric to make more ties and when he posted these photos on Twitter his friends were lining up to place orders! I'm not surprised, I think this is the start of a wonderful tie empire. Remember, you saw it here first!  x

Mr Dapper


Mortmain fest

$
0
0
For the past two Sundays I've been teaching a Mortmain dress class at Badger and Earl. The Mortmain pattern is a simple shape (fitted bodice, waistband and skirt), with a few interesting techniques to get your teeth into (box pleats on the skirt and an exposed zip). This was the first adult class I've taught and I have to say, it was an absolute pleasure. 


The four women who took the course (Joanne, Nicky, Jo and Julia) were all very enthusiastic about the pattern and it was great to chat about sewing with such a lovely bunch. Week one was taken up with sizing, cutting out the pattern and fabric and sewing up the bodice and skirt. Week two involved all the fiddly bits - waistbands, facings and inserting the exposed zip. 


Time ran away with us, but by the end of the day on Sunday, they'd just about managed to finish their dresses (bar hemming and a couple of rogue exposed zip seams). The best thing for me was seeing what a great fit they all achieved. I can't take any credit for this alas, as it was purely down to the fab pattern - it seemed to fit all four of them straight out of the packet! It's very well drafted and the instructions are clear and straight forward - it made my job a lot easier!

Joanne's exposed zip which worked perfectly with her fabric choice
The four fabrics they chose all had a bit of a vintage vibe going on, which worked well with the retro style of the pattern. Behold their beautiful Mortmains - they're all so pretty


And here I am trying to muscle in and steal some of their well earned glory! 


Thank you Joanne, Nicky, Jo and Julia for making it such a wonderful experience. Details of future Badger and Earl courses can be found here. x

One Seam Skirt Explained

$
0
0
After last week's post on the 1950's one seam skirt pattern, I received several comments and emails from readers all intrigued to know how such a skirt is put together. So I've written a post about it. with photos of the pattern pieces and a few crazy reconstructions. Interested? Then read on! 


The pattern is this one - Simplicity 3983 from 1952 - which I bought immediately after seeing Kerry's first version a couple of years ago (she's made a couple more since then too!) The pattern has one main skirt piece which is cut on the fold. The other pattern pieces are a waistband and two-piece hip pockets.  The skirt has no side seams, so hip/bum shaping is given by the two darts on either side of the centre back seam.

For the purposes of this step-by-step, I've made up a teeny, tiny skirt to demonstrate how the pieces go together. I haven't scaled down the pieces perfectly, but it will give you a good idea of how the skirt is constructed. The elf-sized skirt is made up without a waistband (I couldn't be bothered to add one if you must know) but the original skirt does have one.

Main pattern pieces: skirt front/back, pocket and pocket yoke

Skirt piece opened out

First the back darts are sewn.

Darts from right side

The pockets are then stitched to the front curved edges, curves clipped and a snip made into the corner.


This is to allow the curves to turn under neatly to the inside of the skirt like this:


The pocket yoke is then sewn to the skirt and pocket.


On the original pattern, the pocket piece is longer and should be folded up and attached to the yoke like this:


Here's what the skirt now looks like from the front.


With a close up of the hip pocket.


The pucker on the pocket edge is only there because the pattern pieces aren't perfectly drafted. And because I made the entire tiny skirt in about 15 minutes…

Now we get to sew that famous one seam! Please note that in the pattern there would also be a zip attached at the top of this seam after the notch. For this post, I've just sewn the seam all the way to the top.

There's the ONE seam, on the right hand side!

In the normal course of events, you'd now add a waistband but for the purposes of this demonstration, we're done!  Here's the skirt from the back. The proportions are a bit out, so the pockets shouldn't come quite so far round the back of the skirt.


And one from the front…


And one with a spool of thread included as a size reference, just to show you how twitchy the skirt is!


I do love this pattern, it's so well constructed and easy to sew. The pockets are a bit fiddly, but for me, they were the detail that drew me to the skirt in the first place, so they're well worth the effort. I hope that's explained things a bit clearer, and please do shout if you have any other questions.

Have a great day! x

Spring Liberty Giveaway

$
0
0
It looks like spring has finally sprung, so to celebrate the longer evenings and warmer days I'm running a spring giveaway, woohoo!! And what could be more suited to spring sewing than Liberty fabric? Not much, quite frankly!  Susan from Sewbox is very kindly offering one metre of any of the Liberty fabrics she stocks to one lucky winner. Here are just a few of my favourites to whet your appetite….

Danjo - Tana Lawn
Bloomsbury Collection - Dance A: Liberty Lifestyle Cotton
Bloomsbury Collection - Leonard B: Liberty Lifestyle Cotton
Stile Collection- Cranston A: Liberty Lifestyle Cotton
Queue for the Zoo - Tana Lawn 
Jack and Charlie - Rossmore Cord
Sophie Jane - Lantana Cotton/Wool Blend

To enter, just leave a comment on this post telling me which Liberty fabric from Sewbox you'd choose if you're the winner. The full range can be found here. The giveaway is open worldwide and closes at midnight GMT on Monday 6th April. The winner will be chosen at random.  Please make sure you leave your email address if it's not linked to your Blogger profile so I can contact you if you're the winner.

Good luck everybody! x


A bit of crafting

$
0
0
Easter holidays + a horrible stinking cold = lots of lying around on the sofa feeling sorry for myself. There hasn't been much dressmaking going on I'm afraid, but I did manage to get on with a few crafty makes for a recent Rosy Rosie order. Wanna see what I made?

Lined, zipped purses. They always looks neat and professional and are a good way of using up scraps of fabric. I use this tutorial to make them and would highly recommend it - it's clear, to the point and gives great results. 


Tooth Fairy Cushions. These were one of my best selling lines when I sold at craft fairs. Adding the pockets is a bit fiddly, but the final cute factor soon outweighs everything else! This little batch was made with girls in mind. 


Drawstring bag and wash bag sets. I've made lots of these recently! The wash bag is made using my own tutorial. The larger drawstring bag uses exactly the same principle but is scaled up in size (about 18" wide by 20" long). I also add a solid coloured cotton for the inside layer rather than waterproof fabric.


If you like the fabrics then you can still find the owl print here (only a tiny amount of green left, but there's still some in a brown colourway) and the fox fabric in a couple of different colours here.

I also like this bonkers cow print poplin. It'snice quality and as well as being perfect for washbags, would make a fab blouse or dress if you're brave enough! 


It's nice to lose yourself in pretty fabrics and simple shapes sometimes! Happy crafting. x


Viewing all 298 articles
Browse latest View live