This is a very easy tutorial for turning a shirt into a cushion. I decided to try this out after making a memory quilt from my uncle's shirts. There were a few shirts left over and it seemed a shame not to use them up… so I made them into cushions instead. Any shirt would do for this project but men's shirts work particularly well as they're larger, so you have more fabric to play with.
And when I say this project is easy, I'm not kidding - it's quite literally sewing two squares of fabric together!
![]()
And when I say this project is easy, I'm not kidding - it's quite literally sewing two squares of fabric together!

The width of the shirt will determine the size of the cushion insert, so choose one that's roughly the same width. The key is to sew the cushion cover slightly smaller than the cushion insert. This way you get a lovely plump looking cushion instead of a baggy one. To work out the size of your cushion squares, deduct 5cm from the width of the cushion insert, then add 2cm for seam allowances. This cushion has a 50cm insert, minus 5cm = 45cm, plus 2cm seam allowance = 47cm square.
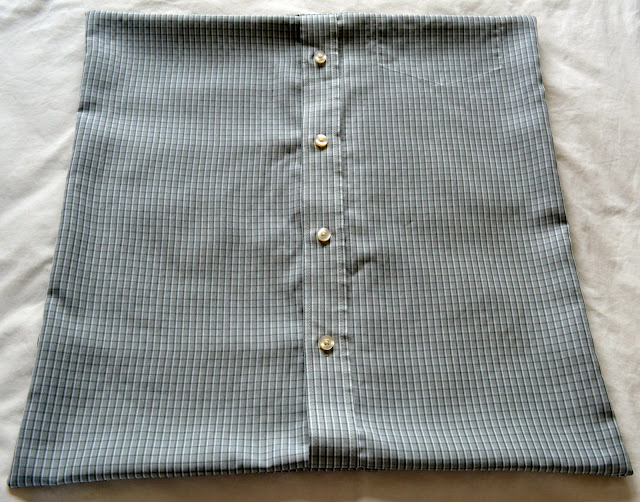
1. Lay your buttoned up shirt flat and smooth out any creases.
![]()

2. On the front shirt section measure out your desired width from underarm to underarm (in my case 47cms), making sure the button band is centred.

Measure the same distance down the length of the shirt. If the hem is curved, then the bottom of the square should finish before the curve starts.
 |
| The square should finish before the hem starts dipping down. |
3. Cut this square out. Then cut a square exactly the same size from the back shirt piece.
![]()

4. Place the two squares right sides together and pin. The front piece should still be buttoned up at this point - don't panic, you'll still be able to open the buttons once it's sewn!
![]()
5. Sew around all four sides using a 1cm seam allowance. Snip the corners diagonally.
![]()

5. Sew around all four sides using a 1cm seam allowance. Snip the corners diagonally.

6. Undo a few buttons from the button band and turn the cushion right side out. Poke the corners out so they're nice and pointy and give the cushion cover a press.
![]()
![]()

7. Open all the buttons on the button band and insert your cushion pad. It will probably be a tight fit, but that's what you're after! This is the view from the front - the buttons are on the other side.
![]()

And here it is with another one I prepared earlier!
![]()
This is a quick, fun project and a good way to refashion an old shirt. As always, if there's anything that doesn't make sense or is unclear about this tutorial, please let me know in the comments section.
Have a great weekend. x
Have a great weekend. x


